It’s been ages since my last product recommendation post so I thought it about time to grab some of my favorites that you just have to try before the month is through.
I was skeptical of
Bumble and Bumble’s Sunday Shampoo at first, but after the very first wash I knew the hype around this clarifying shampoo is definitely true. My hair has never felt cleaner than after using this. It lathers up amazingly well with just a tiny amount and my hair feels lighter, fresher, and free of dirt and grim after every use. It’s perfect for infrequent washers and people who use a lot of product (hands up on both accounts from this girl) to keep your hair healthy and not too weighed down. A little goes a very long way so don’t let the $25 price tag scare you. I’ll be using this bottle for close to a year I’m sure. Throw it on your wishlist immediately.
You’ve heard me rave time and time again about the
Urban Decay Afterglow Blush in “Video,” but it’s officially time you go give it a swatch. The perfect flush cheek color that’ll compliment the colder months amazingly well. It can be worn every so lightly or built up to a stronger flush and it lasts
all day. Blushes are hard to come by that can stand my swiping my face a little too often.
My final recommendation is the perfect foundation for all those holiday photos that are coming up.
The Make Up For Ever Ultra HD Foundation is my go to when I know there are going to be a lot of photos as it mattifies the skin without being flat and cakey. It’s more of a satin finish while reducing any sort of shine that may show up in photos. I have dry skin and find this incredibly hydrating and easy to wear. It doesn’t show dry patches or look weird on the skin. It actually improves over time. It’s definitely something I’m keeping close at hand for the holidays.
So whether you’re finishing up your holiday wishlist or are just feeling kind of spendy, try these three products out this month.

I think it’s safe to say we all struggle with blog photography. Even the pros constantly say how it’s the hardest part about blogging. From trying to get the right lighting to keeping photos engaging, I still struggle after nearly four years of doing this. So here are some of my tips and tricks on making blog photos better.
Starting out I never considered how important props are to a photo. Adding notebooks, dishes, color coordinated makeup, you name it. Even if it’s not even what you’re specifically talking about, adding extra elements into a photo can make it more engaging and interesting to look at. I have a bin filled with random makeup bits, nail polish, and stationery that I keep on hand where I usually take my blog photos. If I find anything out and about I’ll pop it in the bin specifically for photography. You could easily use things you have around the house, but I find it just easier to use them specifically for blog photos. The Target Dollar Spot is my favorite place to find really cheap, cute accessories to add into photos. They constantly have dishes and stationery supplies.
If you’re getting tired of your photographs, change up your background textures. I’m currently in a bright white background phase, but when I get tired of that I’ll move into the kitchen for the hardwoods or a bathroom for interesting tile. Counter tops and blankets also make for a really interesting backdrop. Plus if you don’t have any spare cash to buy some cute photo props, then this trick can really spice up you photographs. Combining props and background textures is also a really fun combo.
In a world filled with flat-lay photography, try changing the angle of your photograph. This photograph below is the exact same set up as the one above, but at a slightly lower angle. Just tipping the camera down slightly can create a completely different photo with different focal points.

Whenever I take my photos I always try a few different combinations so when in editing I can pick and choose which ones work best for the post I’m creating. I’ll take a horizontal and a vertical photo for each post because just changing the orientation can completely change the photo. Vertical allows for a lot more to fit into the photo so it works better for posts about more products. Horizontal really draws the viewer in to get the details of what you’re talking about. Next I take a straight-down flat-lay photo and then take a few more at different angles. I even go as far as to take a photo from the side just to see how it might look. As long as your main subject is in focus, you can really mess around with angles to get the best results.
There are tons of photography tips and tricks out there and I even have another one coming to debunk some of the preconceived notions about how to get good blog photos. The best thing you can do is keep snapping away and work on your skills. Photography really is all about the practice and you only get better with time.
I wanted to start taking more photos just for the sake of it. Photos of our life, adventures, and everyday shenanigans. I’m always taking photos of products and blog posts that I wanted more organic photos. I started snapping random shots and put them in this post to save and collect. Now I realize in the hypocrisy as I’m now starting a series with them, but I’ll only be posting when I have a few photos in each draft worth publishing.
There may be thoughts and explanations attached to each post or it may just be a series of photos of what I’ve been up to lately. I won’t be defining it too much, but I’d love to know what you’d like to see.
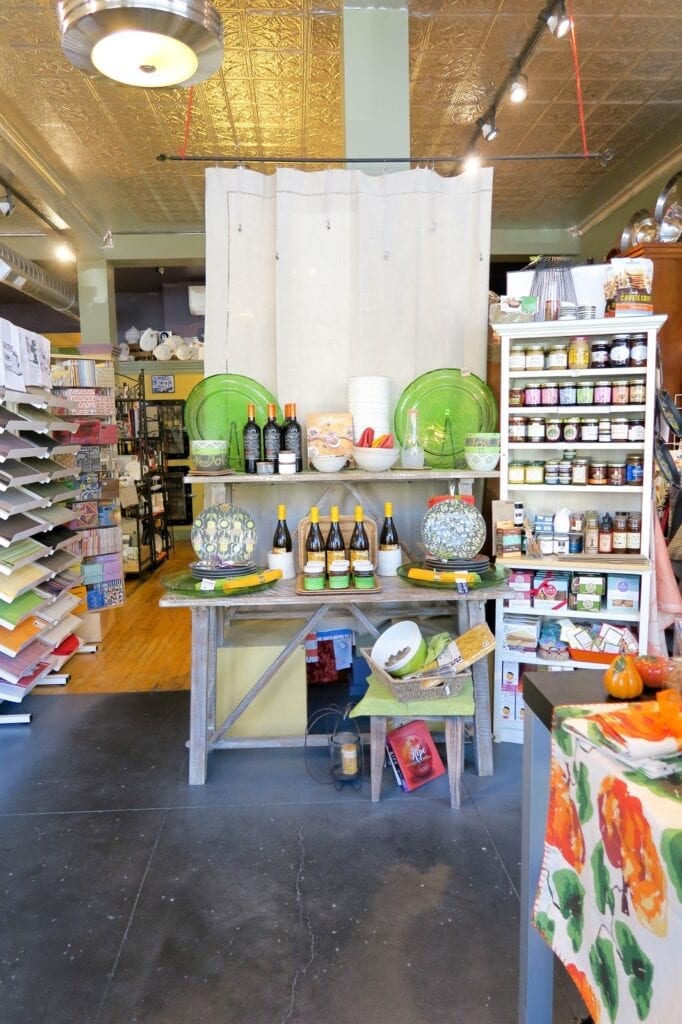
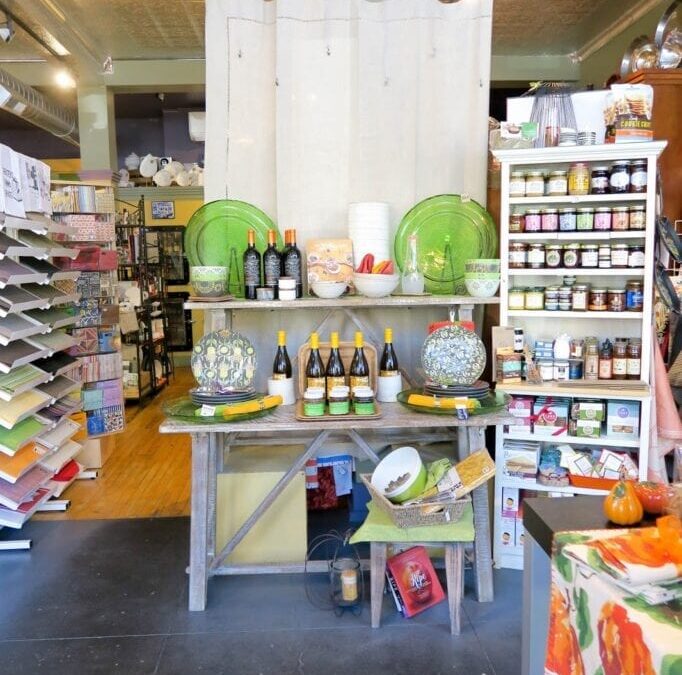
The first photo is from a small shop called Art of the Table in the East Hills part of Grand Rapids. You can see more about it in
this vlog.
So here’s to trying new things with this blog. Constantly switching up content and never really knowing what the heck I want to do with this space. I wouldn’t be me if I ever felt satisfied.
What do you think about this new post style? What kind of snapshots would you like to see?
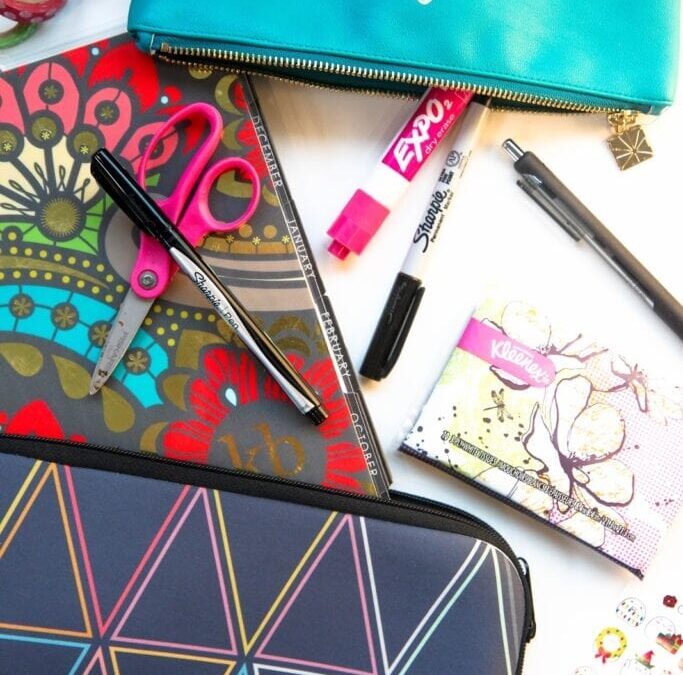
Planner cases are super stretchy so you can really pack things in there. I keep my supplies separated from the actual planner to avoid unnecessary scratching and wear. Everything I tote around with me goes into another, smaller Erin Condren pouch that slides nicely into the case without any trouble.
On average I tend to keep a variety of different pens all serving different purposes. Isn’t that always the case with planner addicts? A million and one pens all for a different use. I personally prefer black. I’ve dabbled with other colors in the past, but I’m a black writing utensil girl through and through. The
fine point sharpie is to write on the laminated dashboards in my planner. The sharpie won’t smudge or come off on its own so it’s the perfect tool to write removable to do lists. In order to remove the sharpie from the dashboards I have a
dry erase marker and a
travel package of Kleenex. It’s a snap to cover the sharpie with the dry erase marker and wipe everything off with a tissue.
The
sharpie pen is for writing on the planner itself. It doesn’t bleed through between the pages so if I’m not writing on a sticker this is the only pen I’ll use on the
actual planner. It also works great on the stickers themselves. If I want a thicker stroke and bolder line on stickers it’s all about the
Papermate Ink Joy Gel pens. Damn are these fantastic pens. They do leave a shadow if written directly onto the planner, but I use them for literally everything hand written.
As for other bits and bobs I always have a pair of scissors on hand mostly because I find I need them for random things throughout the day. I don’t think I’ve ever actually used them for on-the-go planning purposes, but it’s nice to have them just in case. I always have a few sheets of
Blobby around too because he’s just too cute to miss any opportunity to use one.
I’m a no-fuss kind of on-the-go planner girl. Travel planning however is a different story…
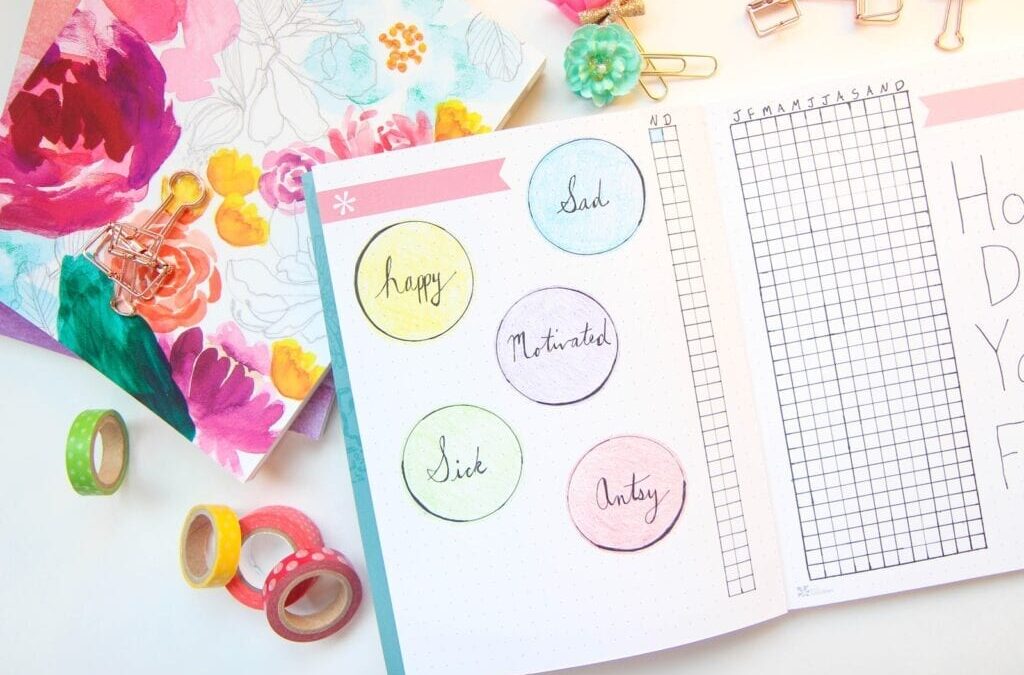
I finally caved a few weeks ago and dove into the somewhat confusing world of bullet journaling. I spent a good couple of days poking around Pinterest boards learning more about the organizational style. I did just as much research trying to find the perfect, reasonably priced notebook to use before deciding on an
Erin Condren dot-grid journal. I’m a sucker for a good Erin Condren journal and thought the larger style would work great for me as I fumble through my first few layouts.
While I was doing my research on bullet journaling there were a handful of layouts that really caught my eye. The main one that really persuaded me into giving this whole thing a go was a mood tracker. A whole year’s worth of moods simplified into daily boxes. At an end of a year there would be a colorful spread of the year’s moods. I had to do it. As soon as my journal arrived I quickly created the first layout, not too concerned with quality. I’m by no means going to devote a whole Instagram to my amazing spreads to have the world fawn over my artistry. I have little to no talent with pen and paper when it comes to creating anything of substance. I know over time my spreads will get better, but I really wanted to try bullet journaling just for me.
Ultimately I plan on using mine as more of a memory keeper and less of a planner so these types of tracking spreads will work perfectly. I want to track all the books I read and create a page to write down happy thoughts. After the end of every month I’ll create a memory spread while working on doodles and hand lettering.
I’m definitely just getting into the world of bullet journaling, but so far it’s been a relaxing, creative journey. There is tons of room for personalization and creating a system of organization that works on a much more personal level than most planners. Sure it’s a little daunting to stare at a blank page and try to decide what to make of it, but that’s what makes it fun too.